
This is the follow-up to my previous post, Pixie Hollow Games Card Frame Recreation Project 2021. I don’t have flat image files of the borders as the talent emblem, Disney Fairies logo, and name are all customizable things that a fairy may or may not want on their border. For this reason, I decided that an editable file would be the best way to share the remade card frames. I will walk through the free image editing in-browser software, Pixlr, and the systems I put in place to ensure easy customization, including your own uniquely colored banner! I’ve designed this tutorial to be beginner-friendly, but if you’re ever lost please leave a comment and I’ll do my best to help you. For more information on how all this came to be, check out my previous post, Pixie Hollow Games Card Frame Recreation Project
Pixlr?
I have also created a single file for the long-trusted, in-browser photo editor, Pixlr which has different accommodations to achieve the same customization offered with Photoshop. I’ve been using Pixlr since 2013 and other than the ads on the side taking up some of your window space, it’s a very easy-to-use and powerful in-browser editor that doesn’t require downloading (other than the images you save after editing of course).
Optional: Download the typeface, Cyan W01 Bold Caps
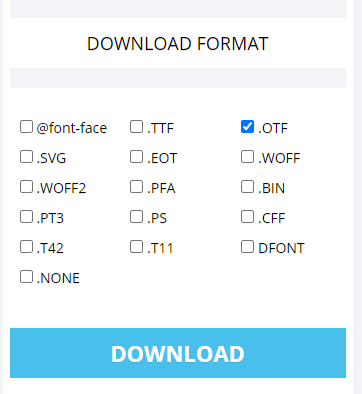
If you want to use the typeface on additional materials, you may want to download the typeface to keep things consistent. You will have to download from Online Web Fonts. The specific font used can be found through this link. When downloading, only select the option that says, “.OTF” as it’s most compatible between PC and Mac systems.
Once the folder has been downloaded, find the option that allows you to extract the files from the folder (usually by right-clicking) and install the “.OTF” file to your computer.
Editing the Pixlr File
- Download the Pixlr editable file by clicking here. It will say there are 12 items to download but rest assured that’s just the assets incorporated in the Pixlr editable file and when you’re done downloading you should be just left with this:

- Go to the Pixlr editor by clicking the link, it’ll open in another tab for you Pixlr.com/e/
- Click the open image button and select the .pxz file you just downloaded. When it is successfully open, it should look like this:

Choose Your Talent!
Time to choose your talent! You will see all the layers to the right pannel, and all your tools to the left. This file is set up specifically to create your own border. Select the checkbox for any layer that you want to see like when choosing a talent symbol to go on your card. If you choose to use one of the already existing talent borders, feel free to delete or uncheck the layers starting with “Border-OC”, then download the desired talent from this list:
Once your banner is chosen and downloaded, you can either drag it right into Pixlr and you will be given the option to create new, or add current. We want to keep the editable settings such as the text box, so we’ll choose to Add current! Depending on the layer selected before dragging in, you may need to reorder your layers so the border appears below your name.

If you prefer the more manual way, to the top of the screen and use the menu as follows: Layer>Add image as layer. Once selected and applied to Pixlr, you may need to reorder your layers so the border appears below your name. Make sure it goes to the bottom of all the layers. And hide the gray versions by checking the eye-icon if needed.
Text Customization
To activate editability, double click the box or press “the keyboard shortcut, T” and up near the left corner of the screen, there should be a box to change the font. Search for Cyan W01 Bold Caps if you’ve downloaded the font, but if you didn’t rest assured as the typeface is part of the document. Be warned, changing the typeface to any of the Pixlr presets will not let you go back to the original typeface without downloading it! The font is already sized to match the official banners, but if your name is longer, then feel free to shrink it and make text adjustments as needed. Be careful when double-clicking as the input sometimes mistakes it for a placement drag and it’ll result in the text frame moving from the original location.

Color Border Customization
If you choose to customize your banner with unique colors, here’s how. There are many ways to change the banner but I’ve found this tactic to be the easiest while giving you lots of control. Select the layer “Border-OC details,” go to the drop-down menu and select Adjustment > Color Lookup.

This will pull up a window with the option for gradients. For our purposes, we’ll change the gradient to be two of the same color, creating one solid color. If you choose a gradient, only one of the colors will show.

To change the color, click the color box and a new pop-up will appear. The color picker will let you choose any color you like with either the sliders, or if you have a specific RGB color you love, you can copy-paste using CTRL + C and CTRL + P the number in the HEX box. Make sure you apply the color twice to both ends of the gradient spectrum so it shows.

As you can see below, if you do not change both colors, you’ll get an in-between. This gradient, for example, results in neither white nor red, but a pink in-between. It’s far simpler to find one color you like and apply it to both ends but feel free to experiment as you like. Apply the same Adjustment > Color Lookup to the layer, “Border-OC background” but this time, a different color so you’ve got a color combo going on.

Specific Color Picking Resources
If you’re feeling lost, it doesn’t hurt to look for color palettes online, paste them into Pixlr and use the eyedropper tool. If you want to be super authentic, you can use the Pixie Hollow Online dye colors which have been sleuthed out by an amazing member of the Pixie Hollow Forums community, Onionleaf. In her own restoration project, she was able to extract the exact Hex dye colors used at Daisy Dyes, her project is an absolutely interesting read which can be found here. Note, you will need to make an account if you haven’t already, but it’s free and safe. I’ve downloaded her images into this folder though, I just wanted to give credit.
Pixie Hollow Online Dye Color Codes
Download an image, drag and drop into Pixlr, Add current and then, use the key “i” to bring up the eyedropper tool to select your color value.

If you select the colored circle, you’ll get a window that’ll give you the HEX code if you don’t feel like typing it out yourself. Copy-Paste it using, CTRL + C and CTRL + P to your Color Lookup settings within your “Border-OC” layers.

Exporting
Once you’ve finished customizing your border and even adding an image of your fairy, it’s time to export. Go to the drop-down menu as follows: File > Save for digital uses. You’ll get a window with additional options for JPG quality which makes it so it’s a flat image and non-transparent. Increase the slider to 100% to preserve as much quality as possible.

If you wish to export the border alone, choose the PNG option and make sure to check the transparent switch so you can insert the image of your fairy later.

You can also use quick export page as PNG to get the same results.

If you want to print, go to File > Print and use the following settings as seen below. Be sure to custom scale to 88% otherwise, you’ll accidentally cut your image off onto 2 separate sheets of paper!

Save An Editable File for Later
If you wish to come back and make changes for later, create your own PXZ file! Make sure you save the name differently from the original so you don’t accidentally save over it!

Congratulations You’re Done!
Whether it’s your first time doing digital editing or you’re a pro, I hope you were able to connect with Pixie Hollow and the Tinkerbell franchise in a whole new way. I’ve been doing digital editing since 2013 and I’m still learning new techniques every day. I hope this tutorial was helpful and if you ever run into any problems, leave a comment and I’ll try to help. For more information on how all this came to be, check out my previous post, Pixie Hollow Games Card Frame Recreation Project
Cya around the waterfall,


STOP this is so cool!!
LikeLike