This is the follow-up to my previous post, Pixie Hollow Games Card Frame Recreation Project 2021. I don’t have flat image files of the borders as the talent emblem, Disney Fairies logo, and name are all customizable things that a fairy may or may not want on their border. For this reason, I decided that an editable file would be the best way to share the remade card frames. I will walk through the free image editing in-browser software, Pixlr, and the systems I put in place to ensure easy customization, including your own uniquely colored banner! I’ve designed this tutorial to be beginner-friendly, but if you’re ever lost please leave a comment and I’ll do my best to help you. For more information on how all this came to be, check out my previous post, Pixie Hollow Games Card Frame Recreation Project
Pixlr?
I have also created a single file for the long-trusted, in-browser photo editor, Pixlr which has different accommodations to achieve the same customization offered with Photoshop. I’ve been using Pixlr since 2013 and other than the ads on the side taking up some of your window space, it’s a very easy-to-use and powerful in-browser editor that doesn’t require downloading (other than the images you save after editing of course).
Optional: Download the typeface, Cyan W01 Bold Caps
If you want to use the typeface on additional materials, you may want to download the typeface to keep things consistent. You will have to download from Online Web Fonts. The specific font used can be found through this link. When downloading, only select the option that says, “.OTF” as it’s most compatible between PC and Mac systems.
Select “.OTF” only.
Once the folder has been downloaded, find the option that allows you to extract the files from the folder (usually by right-clicking) and install the “.OTF” file to your computer.
Editing the Pixlr File
Download the Pixlr editable file by clicking here. It will say there are 12 items to download but rest assured that’s just the assets incorporated in the Pixlr editable file and when you’re done downloading you should be just left with this:
Go to the Pixlr editor by clicking the link, it’ll open in another tab for you Pixlr.com/e/
Click the open image button and select the .pxz file you just downloaded. When it is successfully open, it should look like this:
Choose Your Talent!
Time to choose your talent! You will see all the layers to the right pannel, and all your tools to the left. This file is set up specifically to create your own border. Select the checkbox for any layer that you want to see like when choosing a talent symbol to go on your card. If you choose to use one of the already existing talent borders, feel free to delete or uncheck the layers starting with “Border-OC”, then download the desired talent from this list:
Once your banner is chosen and downloaded, you can either drag it right into Pixlr and you will be given the option to create new, or add current. We want to keep the editable settings such as the text box, so we’ll choose to Add current! Depending on the layer selected before dragging in, you may need to reorder your layers so the border appears below your name.
If you prefer the more manual way, to the top of the screen and use the menu as follows: Layer>Add image as layer. Once selected and applied to Pixlr, you may need to reorder your layers so the border appears below your name. Make sure it goes to the bottom of all the layers. And hide the gray versions by checking the eye-icon if needed.
Text Customization
To activate editability, double click the box or press “the keyboard shortcut, T” and up near the left corner of the screen, there should be a box to change the font. Search for Cyan W01 Bold Caps if you’ve downloaded the font, but if you didn’t rest assured as the typeface is part of the document. Be warned, changing the typeface to any of the Pixlr presets will not let you go back to the original typeface without downloading it! The font is already sized to match the official banners, but if your name is longer, then feel free to shrink it and make text adjustments as needed. Be careful when double-clicking as the input sometimes mistakes it for a placement drag and it’ll result in the text frame moving from the original location.
Color Border Customization
If you choose to customize your banner with unique colors, here’s how. There are many ways to change the banner but I’ve found this tactic to be the easiest while giving you lots of control. Select the layer “Border-OC details,” go to the drop-down menu and select Adjustment > Color Lookup.
This will pull up a window with the option for gradients. For our purposes, we’ll change the gradient to be two of the same color, creating one solid color. If you choose a gradient, only one of the colors will show.
To change the color, click the color box and a new pop-up will appear. The color picker will let you choose any color you like with either the sliders, or if you have a specific RGB color you love, you can copy-paste using CTRL + C and CTRL + P the number in the HEX box. Make sure you apply the color twice to both ends of the gradient spectrum so it shows.
As you can see below, if you do not change both colors, you’ll get an in-between. This gradient, for example, results in neither white nor red, but a pink in-between. It’s far simpler to find one color you like and apply it to both ends but feel free to experiment as you like. Apply the same Adjustment > Color Lookup to the layer, “Border-OC background” but this time, a different color so you’ve got a color combo going on.
Specific Color Picking Resources
If you’re feeling lost, it doesn’t hurt to look for color palettes online, paste them into Pixlr and use the eyedropper tool. If you want to be super authentic, you can use the Pixie Hollow Online dye colors which have been sleuthed out by an amazing member of the Pixie Hollow Forums community, Onionleaf. In her own restoration project, she was able to extract the exact Hex dye colors used at Daisy Dyes, her project is an absolutely interesting read which can be found here. Note, you will need to make an account if you haven’t already, but it’s free and safe. I’ve downloaded her images into this folder though, I just wanted to give credit.
Download an image, drag and drop into Pixlr, Add current and then, use the key “i” to bring up the eyedropper tool to select your color value.
If you select the colored circle, you’ll get a window that’ll give you the HEX code if you don’t feel like typing it out yourself. Copy-Paste it using, CTRL + C and CTRL + P to your Color Lookup settings within your “Border-OC” layers.
Exporting
Once you’ve finished customizing your border and even adding an image of your fairy, it’s time to export. Go to the drop-down menu as follows: File > Save for digital uses. You’ll get a window with additional options for JPG quality which makes it so it’s a flat image and non-transparent. Increase the slider to 100% to preserve as much quality as possible.
If you wish to export the border alone, choose the PNG option and make sure to check the transparent switch so you can insert the image of your fairy later.
You can also use quick export page as PNG to get the same results.
If you want to print, go to File > Print and use the following settings as seen below. Be sure to custom scale to 88% otherwise, you’ll accidentally cut your image off onto 2 separate sheets of paper!
Save An Editable File for Later
If you wish to come back and make changes for later, create your own PXZ file! Make sure you save the name differently from the original so you don’t accidentally save over it!
Congratulations You’re Done!
Whether it’s your first time doing digital editing or you’re a pro, I hope you were able to connect with Pixie Hollow and the Tinkerbell franchise in a whole new way. I’ve been doing digital editing since 2013 and I’m still learning new techniques every day. I hope this tutorial was helpful and if you ever run into any problems, leave a comment and I’ll try to help. For more information on how all this came to be, check out my previous post, Pixie Hollow Games Card Frame Recreation Project
The Olympics have ended and yet, I had the brilliant idea of recreating the promotional card border artwork from the Pixie Hollow Games for original character expression purposes. Here is a brief history, a personal anecdote, the unsung hero that is PDF printables, and the process to recreate the Pixie Hollow Games card frames in 2021.
Many seasons ago
A 30-minute TV special named, Pixie Hollow Games aired on the Disney Channel on November 19th, 2011. Leading up to it’s premiere, were promotional card artwork of the participating fairies and garden fairy Fern, voiced by Disney actress, Zendaya.
Screenshot from the Pixie Hollow Games (2011) -Trailer.
The cards featured a unique fighter pose for each fairy or sparrow man, with a border color-coded to their specific talent and written in white with their name. The version of the cards from the initial Pixie Hollow Games trailer is noticeably different as the girls are not in their uniforms and Fawn and Iridessa’s pose were both slightly altered in composition and position. The light talent emblem also is different than the one seen in the TV special, sporting a similar feathered edge as the animal talent emblem. The lack of the newer outfits suggests that the costumes might have still in development by the time this trailer came out.
Fly to your heart
I never stopped thinking about the impact of Pixie Hollow Online closing in September 2013 and how the Disney Fairies franchise has changed how I view and create art. After it was shut down I went to forums and then, chatrooms with PNGs for avatars and JPEGs for rooms, and then a blog to share my pixie creations and now most recently, a Pixie Hollow Discord server where lamenting over lost of art is a pastime. I didn’t think the loss of something that’s not physical could be just as impactful especially after all these years yet, it feels like I’ve lost a part of myself.
As a young pixie and targeted demographic of the Disney Fairies franchise, I saw these card borders reflected the larger fantasy and influence the Pixie Hollow Online MMORPG had on the franchise as a whole; impactful, customizable, character driven. Pixie Hollow Games cards the perfect outlet to reclaim some of the missing identity much in the same way the iconic character creator, profile badges, clothing and dyes in Pixie Hollow were a way of self expression.
Fanmade Pixie Hollow Games Card. (2016)
After much ruminating on this empty feeling, I realized the potential of the Pixie Hollow border cards to bring me back to a sense of home and in perfect timing with the Olympics which the Pixie Hollow Games took inspiration from. I wanted to create a way to express the same childhood exploration for others in an accessible way using what I’ve learned in the time since I wrote last.
Scavenger-hunt talent
Digital preservation of high quality borders did not appear in google image searches and as is the case with lots of old pixie hollow art, it contains digital artifacts which alters the visual data and makes details very murky and hard to read. More noticeably than the frame, the flag representing the talent of the featured fairy also had compression issues. If I were to recreate this frame, not only would I need to make it from scratch, but I’d also have to find better quality images of the flags.
A google search for high resolution flag images lead me to the Pixie Hollow Fandom Wiki which featured under the Water and Light Talent pages, the corresponding flags under Talent Symbols.
Water Talent Flag Transparent Image.
Other than the wiki lacking the other talent flags, the quality of the only Water Talent Flag image online was not suitable for a faithful recreation because of the artifacting on the border of the flag seen in the random warm tones at corners, and the very pixelated and inconsistent cut around it’s source image.
I also needed images with less artifacting than this if I were to recreate the frame faithfully. I ran across all the fairy cards in my searches and upon looking at the websites they’ve originated from, I found the Palm Beach Cove of Pixie Hollow Game Printables, SKGaleana. Safely archived away were PDF activities for parents to print out for their children which, is the singular source of all the Pixie Hollow Games card artwork distributed on the internet. Each fairy had a printable, foldable, trading card including a backing with unique information that I hadn’t ever seen before.
Before me were the most uncompressed files of all the Pixie Hollow Game cards I’d ever find on the entire internet. Made specifically for the use of printing, the images naturally had to be very high resolution. While it troubled me how small the image still was, I was none-the-less extremely grateful I had found a reliable resource to base my recreation off of. As for the flags featured, due to how the PDF was created, each flag on a pole was too small, and was also cut in such a way that the bottom edge of the flag was often missing and then recontinued on the pole itself. Stitching these images and extracting the pole was an approach I considered, but upon further investigation I discovered an even greater resource.
PDF screenshot from the Pixie Hollow Games Party Pack featuring Garden, Tinker and Animal Talent Flags.
The Disney FairiesPixie Hollow Games Party Pack PDF features an invitation cards featuring artwork of each of Tinkerbell’s friends as well as Glimmer and Chloe unique to the Pixie Hollow Game film, two scorecards with listed Pixie Hollow Game events and most importantly, the highest quality flag images that could be easily made transparent.
For the general public, finding high quality images of Pixie Hollow assets can only be found in this way. In a professional workflow, typically the graphic designer is given assets by the movie staff to then be composed into whatever is asked of them which, in this case is printables. Companies don’t just give assets out unless it’s part of a press kit for the purpose of journalism which makes printables like this a key resource to the general public for digital preservation. What’s more official and high quality than renders sent from the film department and compiled into a PDF by a Disney graphic designer?
PDF screenshot from the Pixie Hollow Games Party Pack featuring Storm, Water, Fast-Flying, and Light Talent Flags.
This doesn’t mean however that hiccups can’t happen even within a professional pipeline. The water talent flag I encountered earlier with very bad compression was most likely not sourced from here as there are extra darker pixels that don’t represent any that were present in the PDF version. However the PDF water talent flag, not subject to as much artifacting, the suspicious aliasing and pixilation on the edge is unlike any of it’s neighboring flags.
In comparing the two flag files, a oddly thicker upper left edge and an inconsistent left edge of the flag is present in both. It could be possible that even in the official Disney PDF that the graphic designer had to make do with a lesser quality water talent flag available to them?
Pixie Hollow Wiki Fandom Water Talent Flag
Pixie Hollow Games Party Pack PDF Water Talent Flag
Comparison between water talent flag quality
Even the smallest compression can lead to a large loss in validity and accuracy of digital images. While analyzing the two, I can’t tell if the uneven vertical left edge is supposed to have shadows and highlights where they’re supposed to be. (Comparisons are best seen on a white background)
“I feel so tinker-y”
The approach to create higher image quality card frames was unlike any previous Pixie Hollow editing I had done in the past. I wanted to recreate the frames faithfully and from scratch, by analyzing and thinking within a professional workflow perspective. While reconstructing the borders entirely in photoshop was an option, the quality of the border being very simplistic and minimalistic in form, as well as being something created by a graphic designer and not the same artist that created the character art, meant the most likely program being used was Adobe Illustrator.
Using the PDFs from SKGaleana with card art, I used vectors and the width tool to match the design as closely as I could. Pixel width discrepancies made this very challenging. With each time I’d compare the two, a curve would be slightly thinner or thicker than the original. Trouble like this obviously comes from me trying to recreate one-to-one, the workflow of the original designer probably went uninterrupted by such.
Screenshot work in progress of garden talent border.
Once the frames were complete, I exported the artboards with extra bleed area because I had noticed with the PDFs the white border around the frame actually cuts off the edge unevenly on the frame design. If you look closely, the left curve detail going down is cut while the curve going down on the right just barely makes the white border.
Silvermist Pixie Hollow Games Card front and back with fold and cut lines from home activity printable.
In professional printing, you make a “bleed area” which allows artwork to go beyond where the cut line would be to ensure that no crucial art gets lost. The printable version of this card is the reverse of that. The artwork was sacrificed to create a white border that would be later be cut with scissors . I can only assume that the intention was that by cutting in the white area the colored section would be assured to be a perfect rectangle, at the cost of the edges being cut off and additionally, some flags being cut off at the bottom as well, in my recreation I made the border with extra bleed area and placed the flags in full view as to not lose the artwork.
Screenshot from the Pixie Hollow Games (2011) -Trailer
When you look at the trailer’s use of the border, a white outline is not present and all the flags except for perhaps the water talent, safely keeps it’s flag within full view. An additional note is the absence of a Disney Fairy logo at the top center of each card and the copyright symbol. As these are in an advertising setting and not a printable application, they changed to fit their intended purpose. This brings up the question of which border is the true official one I should be replicating? I decided that a simple flat PNG file wouldn’t suffice for customization purposes so I instead, organized my PSD files going forward with layers that accounted for all these elements.
Photoshop screenshot close up animal emblem comparison.
Similar to how I used reference directly on top of my work to ensure faithful recreation, I made sure to layer all the flags in their respective positions. In doing so, another decision arose. Comparing the flags I had found and made transparent and the ones used in the Pixie Hollow Games official art, there was a slight stretch or squash done to some of the flags on the cards most notable on the animal talent flag (see how the animal print splotches are misaligned). It could be another sign of bad compression, so for the purposes of my recreation, I chose to leave the flags in their original state especially since I had already created a larger border to account for the narrow space on the edge.
Original garden talent emblem on card.
Another note is that the animal and garden talent flags in the original had a twisty vine at the top of their emblems. This is unique to them and doesn’t appear on any other emblem. In my search for other flags, I did find flags that were mounted to poles with different designs in the PDF printables for each fairy’s card but not in the same style. It also features a bonus random vector stroke outline of the Garden fairy flag pole.
Close up look at page 3 of the Pixie Hollow Games Playbook printable PDF.
With no original source featuring the alternative small vine design for the garden and animal talents, I diverged let again from the original by utilizing the high res PDF versions without the vines. Not only is it more consistent with the rest of the talent symbols but allows me to use the highest resolution version in my possession. I considered whether it would be worth trying to redraw it, but with the same faults as the banner I made in Illustrator, the source images are far too compressed to reliably recreate it accurately.
“You just don’t know when to stop, do you?”
Yet another reason why digital archiving is so important: text. Finding the exact font used from a flat image and one so distorted and small as the Pixie Hollow Games trading cards, is a whole challenge that deserves it’s own section.
Each card has the name of the fairy featured in a decorative all-caps typeface as well as a Disney copyright symbol. Using the WhatTheFont! feature of MyFonts.com, I was able to easily identify the typeface being used for the pixies’ names but the typeface for the copyright was another story.
WhatTheFont screenshot results page from Disney copyright image analysis.
Not even the WhatTheFont Ai could make sense of the copyright. I instead, went to the card backs which contained information on the personality of each fairy. The writing was bigger and thus, more readable. It’s safely assumed that they would be the same typeface as it’d be disruptive to the eye if they were subtly different typefaces instead.
WhatTheFont screenshot results page from card back text.
Even with the secondary suggestions, the “e” looks different than the sample showing, yet again, even with better quality samples to pick from, it still isn’t perfect.
In applying text to the card frames, another small detail is worth note. Each character’s name has been optically kerned and sized to fit the designated spot for names. The general public might not be as sensitive to subtle type changes as this, but in graphic design it’s incredibly important and often overlooked, especially when rushing to meet deadlines, however it is subtle details like these that add to the visual appeal and hierarchical harmony of graphic design.
Screenshot of Photoshop, Fawn card and “Fawn” text placement comparison.
Taking the type placement of Fawn’s name, as example, its very evident with the “W” and the “N” that don’t line up when using default settings for text that, some kerning to bring the letters closer and at optically equal spacing. (kerning is the distance between letters) The difference between optical and metric spacing is that, optical spacing is how the eye perceives distance versus mathematically equal spacing. While mathematically the letters should be equally apart, the negative space left by letters especially large capital letters makes the spacing uneven and unnatural. These subtle alterations show that whoever graphic designed and typeset the cards took great care and detail into them and I’d expect no less from someone at Disney.
“All children, except one, grow up.”
I hope that through documenting the exhaustive process of reviving old art that, even with resourcefulness and a good workflow, it is a challenge. This project is a recreation, not a restoration or a replacement for the original art. Along the way I made calls that altered the design due to assets not being exact, and reference images too pixelated to analyze accurately. It is so important that we preserve what assets we do have just as SKGaleana had for, without SKGaleana and the Wayback machine to find some of the PDFs, I could not have been able to complete this project with the same artistic integrity. Please give them a visit if you’re interested more content in the printable PDFs that I didn’t mention. It is amazing that they share the same sentiments saying in their post, “Events like this need to be well documented and I am sure the other parents would love to get copies” and I hope my actions showcase the same pursuit.
I continue to be inspired by the art I love, whether it be the direct to DVD movies or the home activity printables for children under 6. Peter Pan, the Disney Fairies original source material emphasized the importance of youth and the quote, “Never say goodbye because goodbye means going away and going away means forgetting,” resonates deeply with me when remembering my time as a fairy. Being so strongly attached to something that’s long gone feels so lonely and empty but if I say goodbye and tuck my fairy-self away, then I’ll be forgetting that part of me. Doing projects and edits surrounding Pixie Hollow is how I continue to stay connected and remember to have faith, trust and pixie dust.
To any fellow pixies out there that would like an editable version for themselves, I’ll be publishing a tutorial with the PSD files I used to create these as well as sharing an editable version for people without Photoshop soon. By making these card frames customizable in an accessible way for fairies, I hope it’ll help to connect you with a small fraction of what’s been lost just like it has for me. Thank you so much for your time and attention.
I had a lot of inspiration from art development images from the studio that made the Tinkerbell movies as well as the Pixie Hollow Games short. I also referenced some uniforms from the Olympics to incorporate the more practical side of the outfits. The real challenge in creating the uniforms was balancing between being practical and being stylish. But comparing outfits form the Pixie Hollow Games and the Olympics helped a lot!
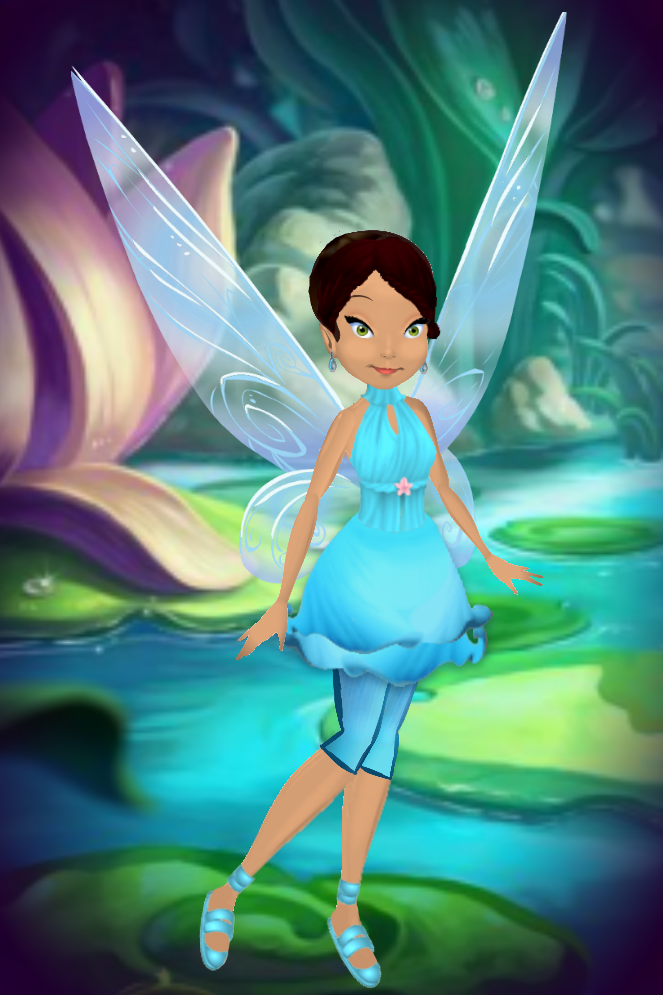
Water Talent
I wanted to emphasize a tropical feel with a lot of freedom to move in the water talent’s uniform. When I think tropical I think sea and water so I really wanted to make sure that was reflected here and because water is a very calm flowing element, I wanted to make sure the outfit looked easy to move in. The skirt is supposed to represent waves while the top has a nice summery look.
Garden Talent
This uniform was heavily influenced on the Olympic leotards in gymnastics. They are very pretty, form fitting, and sparkly! The top is reflective of that with sparkles and see through sleeves like many stretchy leotards have. I kept the bottoms similar to the water talent’s so its easy to move in and versatile for other events.
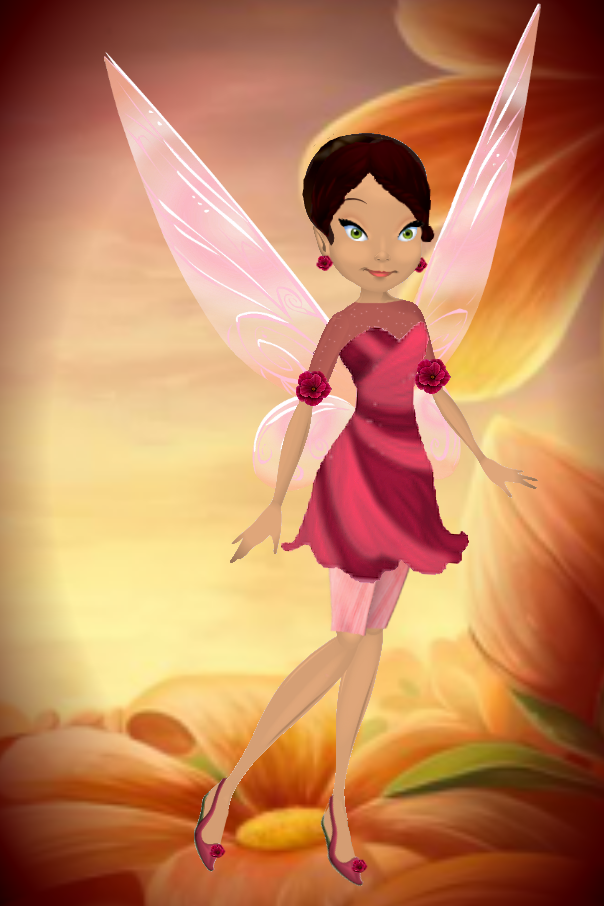
Tinker Talent
This uniform is the most versatile of the three uniforms I imagine that a tinker fairy would fashion an outfit to be the most practical and performance enhancing of all because of their desire to engineer something so it’s even better. That’s why its the most streamlined, sophisticated and ready for action!
Making these outfits was so much fun but they took A LOT of time to do. That’s why there isn’t a light or animal fairy uniform but I hope the quality I put forth in these is enough to compensate for the quantity!
We left off with adding hair to the model and now its time for my favorite part of all, dressing the fairy! The Pixie Hollow – Disney Online Worlds Guide (Wiki) will be your best bet to getting all the clothes you want if it’s from Pixie Hollow. Or you could go to the more trending option of downloading the Dress Up game from Pixie Hollow Forums.
I’m not certain how it works because I haven’t used it before because I cannot download stuff (problems of having a tablet as a computer) but I’ve seen the results of high quality clothing which may be the best option ever created to make the process more fun and interesting. However, I’m going to go the long way round!
To include the majority of the techniques I use I’ll be doing a little of everything. I’ll be using some Pixie Hollow clothes as well as making some of my own. I’ll do simple techniques and then move on to the more complicated so we can build on what we already have going.
Step 1: The Theme
In order to have a successful fashion design, you must think of a theme so your outfit isn’t all over the place and has no direction. Since many pixies will want to make their own original outfits for the Pixie Prom theme of By the Sea, I’ll go with that. To gather more of a vision I like to go to Pinterest which has so many pretty pictures of EVERYTHING!!! (you will need an account for this but you’ll thank yourself later when you get to pin all your ideas in one place)
After gathering yourself some inspiration and a vision for what you want to create the second step is execution!
Step 2: Execution
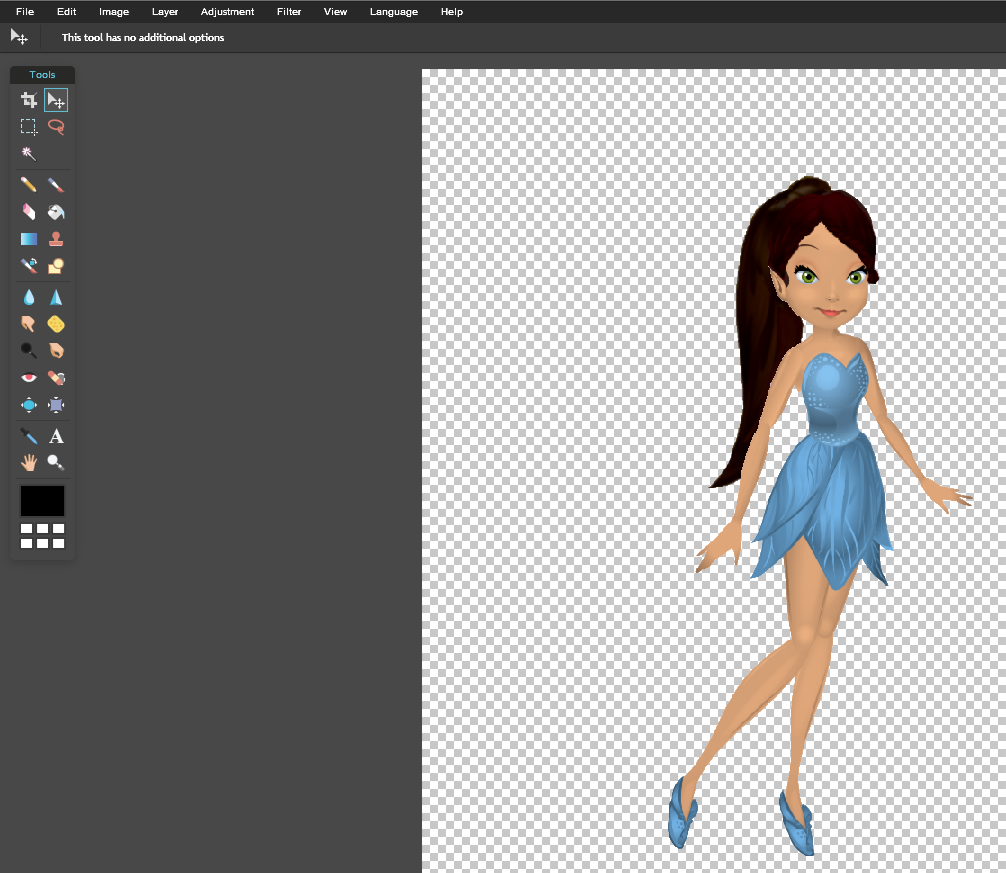
I’m going to use some stuff in my archives and some new to create a cute spring dress! So first we must bring out the model from before!
I like to start with the top and bottom and have the little things follow as compliments of the entire look. So for a top I’m going to search through the Pixie Hollow Wiki for one that has the right design, not so much color (I’ll get more into that bit later!)
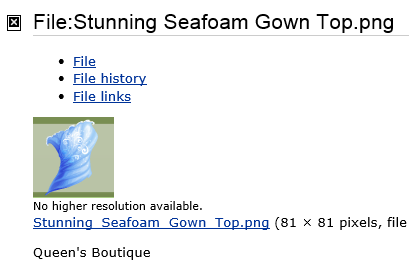
I found a pretty top!
On this one I lucked out with a pretty plain background. However, some tops might require hand erasing in order to get good quality out of it. I find the quality to be better if the clothes are blown up to the size you need before erasing, just as a little something to give it more of a polished look.
Size/Quality depends on what you’re editing for. Worlize resizes all the avatars down to 200 X 200 pixels so little details or a blury top won’t be very worrisome. But if this is a super sized project you’re going for, you might have to do some tweaking to it!
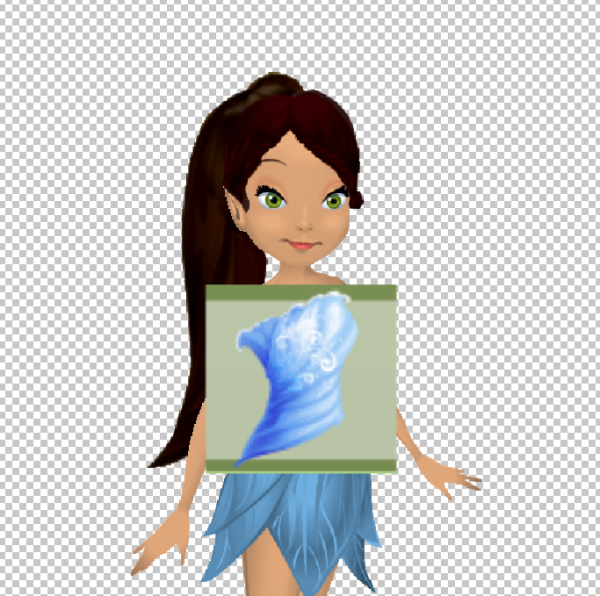
So I uploaded the top as a layer, and blew it up to about the size of what I needed:
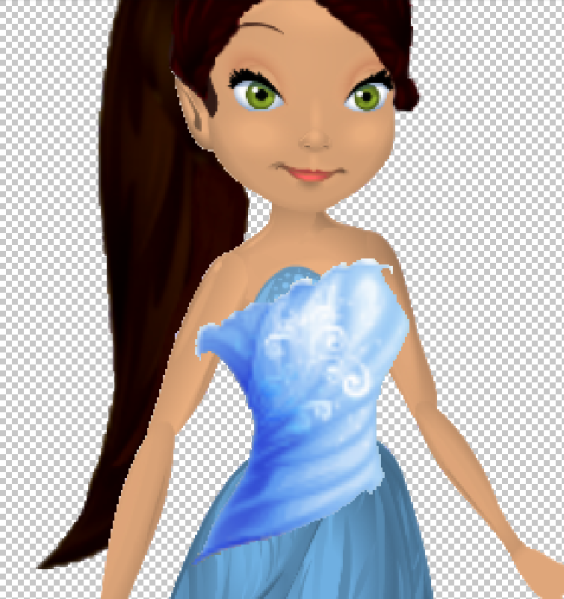
I then use the magic wand and change the tolerance to what I need and erase away! The end product should look like this:
Notice at of the chest still shows a bit of the old top. When this happens you take the color picker tool that looks like an eye dropper, and you click the skin tone nearest to the chest and color the area on the layer with the fairy itself. It’s best to use a softer brush to cover up the spot so it looks well blended in.
Vs
Now for the skirt! I might want to make something not PH related for a wow effect! When it comes to making new clothing there are many possibilities
Make your own clothes right in the editor but, it might not be what you want or not work well with what is already there.
Use a painter’s app and create what you want and then upload the picture as a layer like the first time round but again it might not be what you’re looking for.
Hand draw clothes you want working with a picture of your fairy printed out and use computer paper on top to draw the outfit. This gives you the most control and perhaps best foundation for creating what you want but it come with more complex steps. Once you’ve finished drawing out the clothes you would like, you will have to ask your parents to scan the picture using a printer and then upload it to the computer for you to use. This might become a mess as a result so experiment at your own risk!
Find clothes to use online similar to the process in finding the gown top as done above only with real life clothing. This is a fast way to go and is probably best for beginners but it comes at the cost of accidental pirating people’s websites so BE CAREFUL! It’s best to use stock images which are free to everyone for use most of the time. But if it comes from deviant art it’s best to stay away or to read the uploader’s conditions of use before using.
For this tutorial, I’ll be doing the simplest of the editing type and perhaps most time saving which will be the 4th option.
I surfed the internet for some time and one deviant-artist had created multiple dresses which are free to use!
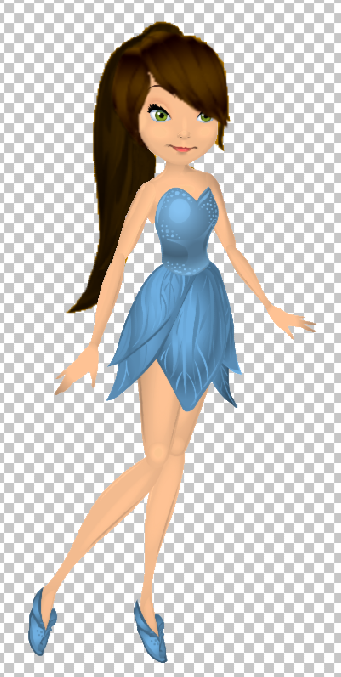
After you find a bottom you like go through the same procedure of uploading it as a layer and fitting it to the fairy.
Before
After
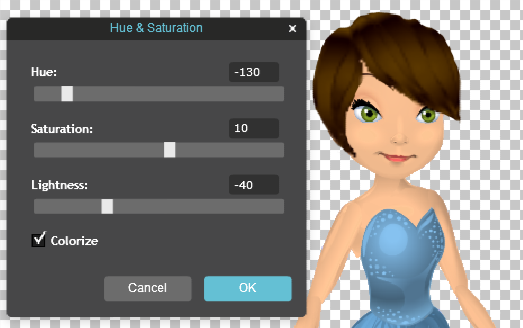
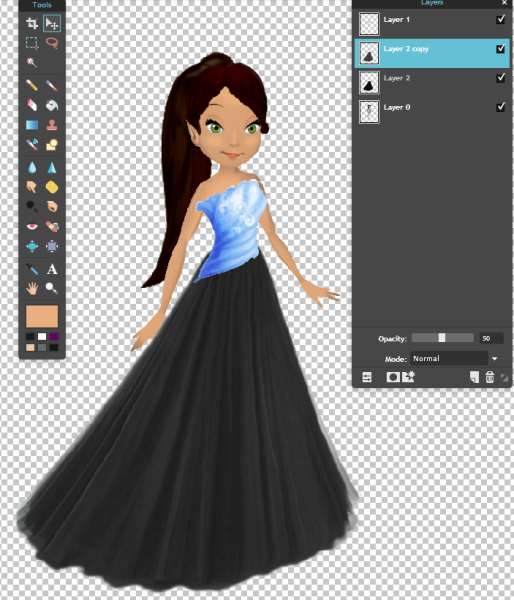
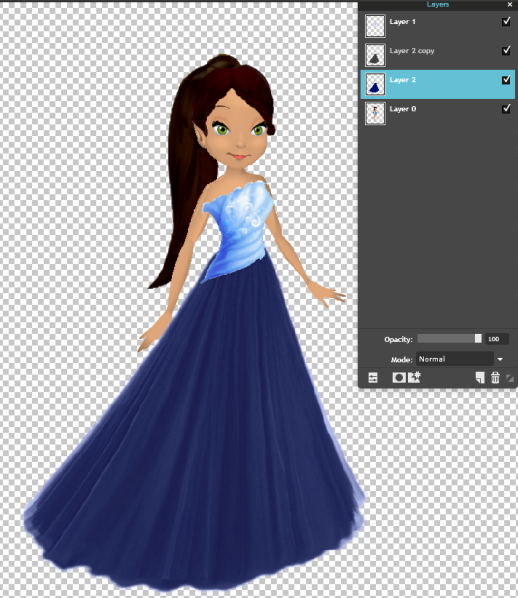
Now I know what you’re thinking… THAT COLOR!!! Sure black is classy but it’s not suited for this dress! And this is where we take our recoloring talent to life!
Remember: Adjustments > Hue & Saturation > fool around with the options till you’re content
However, given the fact that this is black, it will be hard to change the color without it becoming a weird color so we have to take extra steps!
1. Duplicate layers
2. On the upper of the two layers, Adjustments > Hue & Saturation > Turn it a grey shade and adjust it 50 on transparency
3. On the other layer, Adjustments > Color balance > find the general shade of color you want (it doesn’t have to be exact)
4. Go between both options of Color Balance and Hue & Saturation and even Transparency on the upper layer until happy.
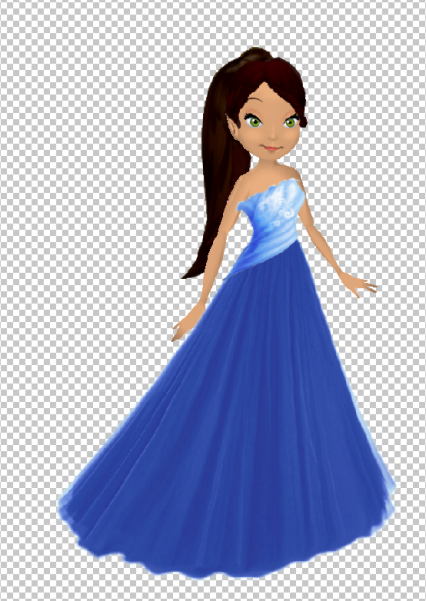
Now we’re getting somewhere! This is a good place to end this tutorial. Of course it is still very plain but I’ll get into accessorizing next time, even making your own jewelry! 🙂 Stay tuned as we count down the days to the Pixie Prom!
Hello Artists! I’m back with the next installment of The Evolution of Editing! I originally wanted this to be the last Christmas present to you all, but family and studying have gotten in the way. But here we are, one step closer to complete! SO LET THE EDITING BEGIN!!!
Picking up where we were off last, from Editing Pt 1: The Model you should have a transparent fairy with the desired skin tone and hair color. If not, be sure to check back to it with this link before continuing here.
Finding the Hair: The side swept bangs is a very popular style and the solid version sadly isn’t recorded in the website Disney Online Worlds Guide along with many other styles. They do have all the classics and some of the designs with the highlights before Pixie Hollow changed it all, but even that isn’t really all that good. So FIRE UP THOSE SEARCH ENGINES!!!
Like a determined shopper in an infinite mall, you will be hunting down multiple pieces that will come together and complete the look. This will probably be the most time consuming part, but if you get creative where you look, you might find what you need faster.
(NOTE: When searching the pixie hollow forums, it may ask you make an account but its free and isn’t too much work. This has everything pixie hollow related and is pretty well sorted. You often find high quality pictures of fairy clothes and hair to extract)
Disney Online Worlds Guide is still a great source and instead of searching for so long we can work with what we have!
If you liked the solid bangs then we find the bangs that look most solid with the green highlights and instead of taking the picture of the one in a box which would be much more simple to extract, the picture would end up blurry when fitted to the large model along with the little star in the corner blocking part of the hair and not having proper reference for fitting it to the head.
VS
Upload the picture of the fairy wearing the hairstyle to the already edited picture of your transparent fairy.
Then taking the magic wand and adjusting the tolerance on the wand, and inverting the selection like before in making the picture transparent, erase all of the picture but the hair. Some of it might have to be done by hand as well but it gets most of it done. Also be careful when using the wand that you don’t erase a part the hair and end up making a hole in it. Once its all erased, go to edit and down to free transform and fit the hair to the head and should look like this:
Then given that the top of the head shoes through, go to the first layer and click it so it glows and erase the unwanted parts. If the previous hair shows through then use the tool shaped like an eye dropper but is called the color picker tool, and click the part of the skin that will match where you want to cover it up and using the soft small brushes, cover the part where the front hair didn’t cover up. In the end it should look like this:
I know it looks silly but now it will look like you want. With the swept bangs in place, click the second layer with the hair front, go to Adjustments and then Hue & Saturation. Fool around with the colors until you get the desired color. Be sure to fiddle with the colorize option that makes everything the same tint and color like seen below.
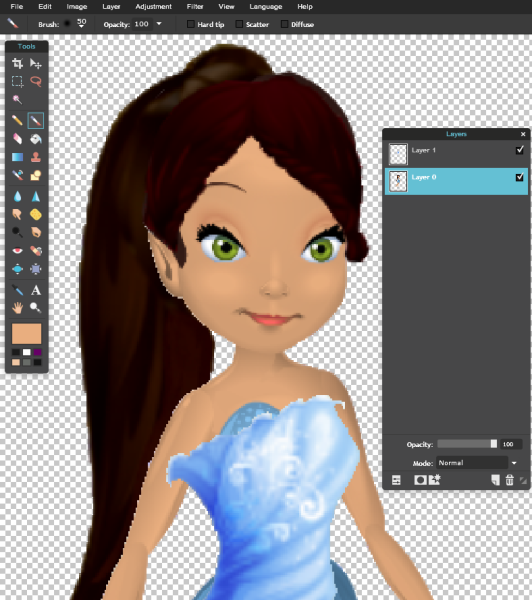
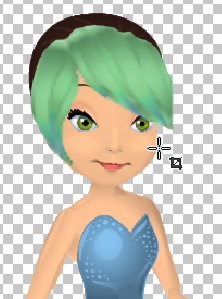
Now that it looks more like your fairy and perhaps the color makes the picture more visible you might have to adjust it again another tool that works similar to free transform is free distort found right under transform.it will be your best friend when it comes to final fittings. Now that you did the front, do the same to the back hair style. When you’re done getting the pieces in place, you might end up having to adjust the color to match or do some extra distorting but when your done you should have the back, and front hair done. Despite the clothing, your fairy should look how you want it. This was my end product:
This was a general introduction to layers and when we start adding clothing to the doll there will be a lot more to it! Be sure to save the end product somewhere safe because you can use this for all of your other projects to come!
Ever since Pixie Hollow closed I have been depressed and I went on a journey to bring back the joy I had playing the game. I wasn’t so tech savvy when pixie hollow shut down so I couldn’t save anything so I went on a quest. To learn how to edit and do it to recreate my fairy. Many may not need to recreate their fairy but if there ever comes a time when you need to start from scratch, here’s how to do it!
The Model:
Whenever you want to create an outfit, you must have a model and it should be wearing as little as possible. This way you don’t have to draw in part of an arm or erase part of a foot to use it. Here are some to get you started! I keep the forehead pretty plain in case you want to add swept bangs on
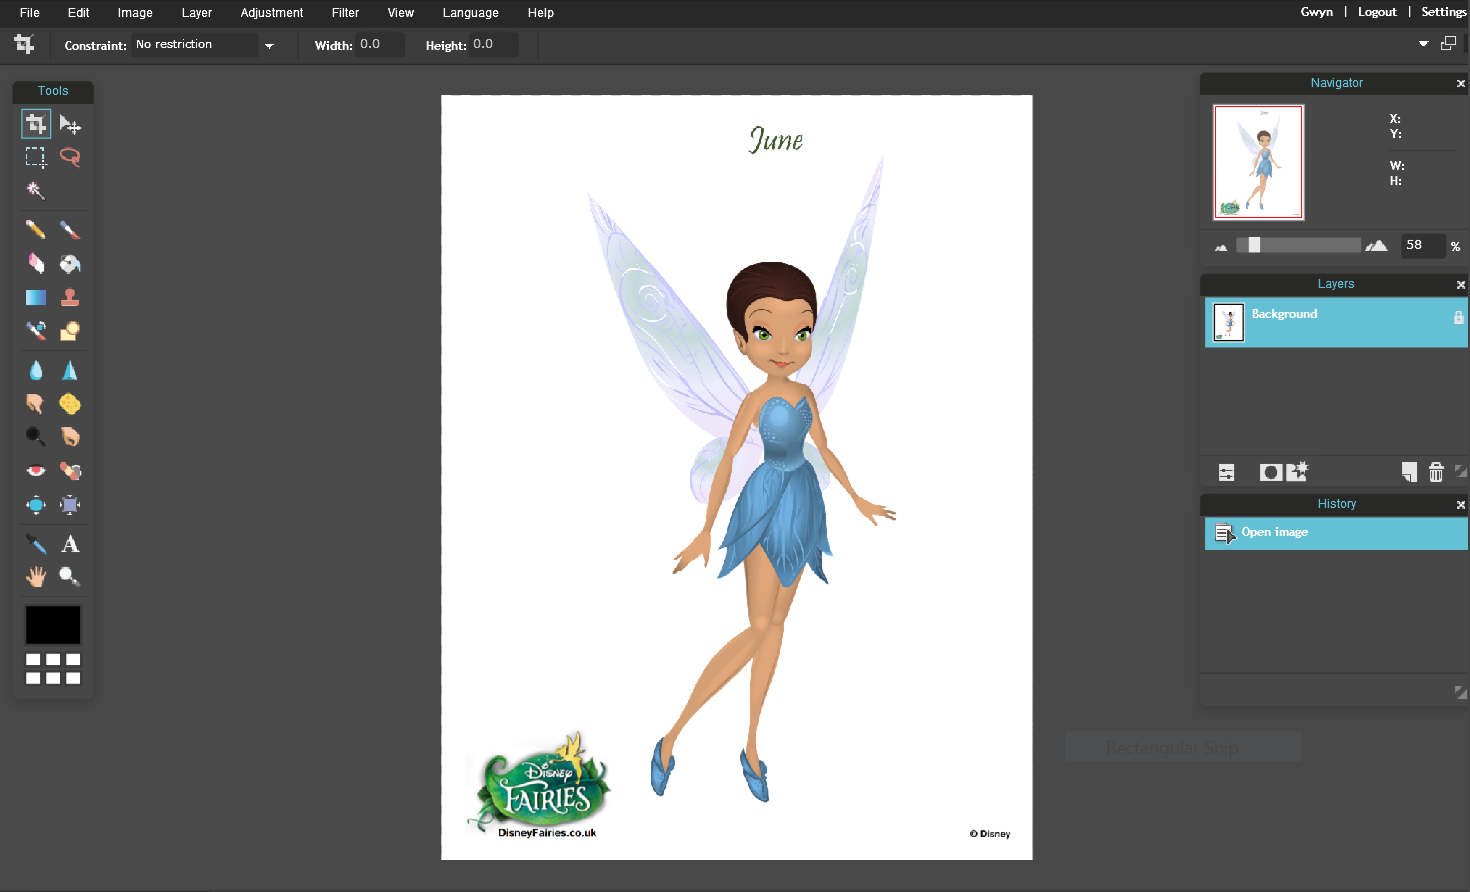
Editing Systems: Now I know there isn’t much variation but this is when editing systems come into play. I use Pixlr which has all the basics for editing but if you have PC Photoshop or go by other methods, they should also do the job. The thing that separates Pixlr from most editing software, is the fact that its online and you can create an account and save your work on there instead of taking up your computer memory.
Uploading:
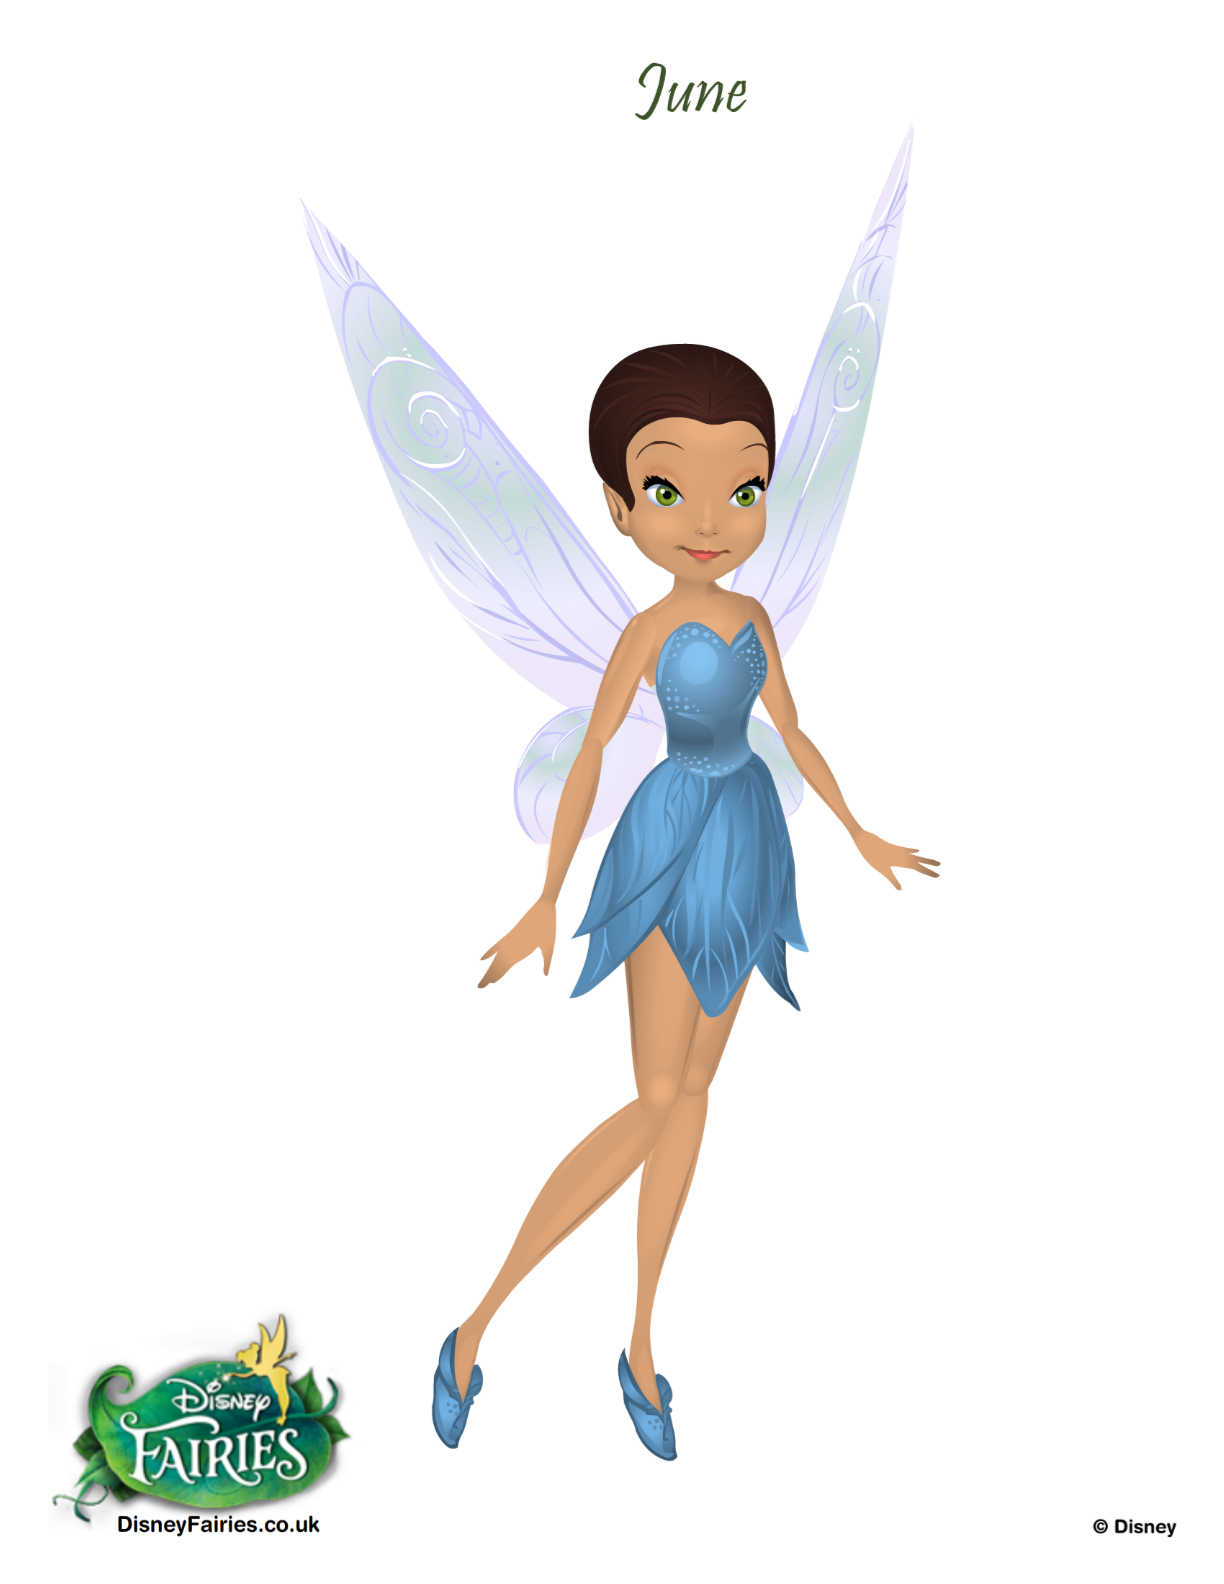
Upload a base that is closest to what you need for your project. For this tutorial I will recreate my fairy June for you which will be the set example.
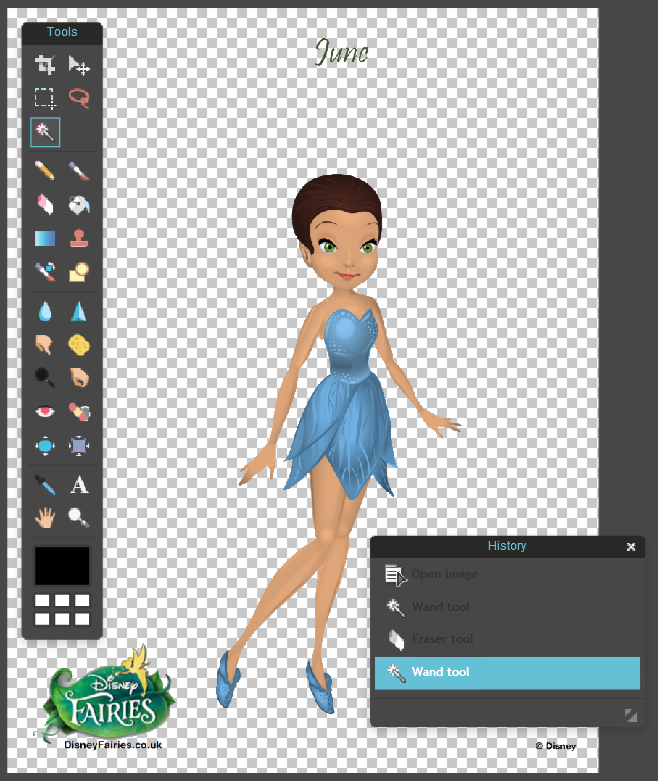
Your New BFF the Magic Wand and Making the Picture Transparent:
Looking at the tools section you will find this icon
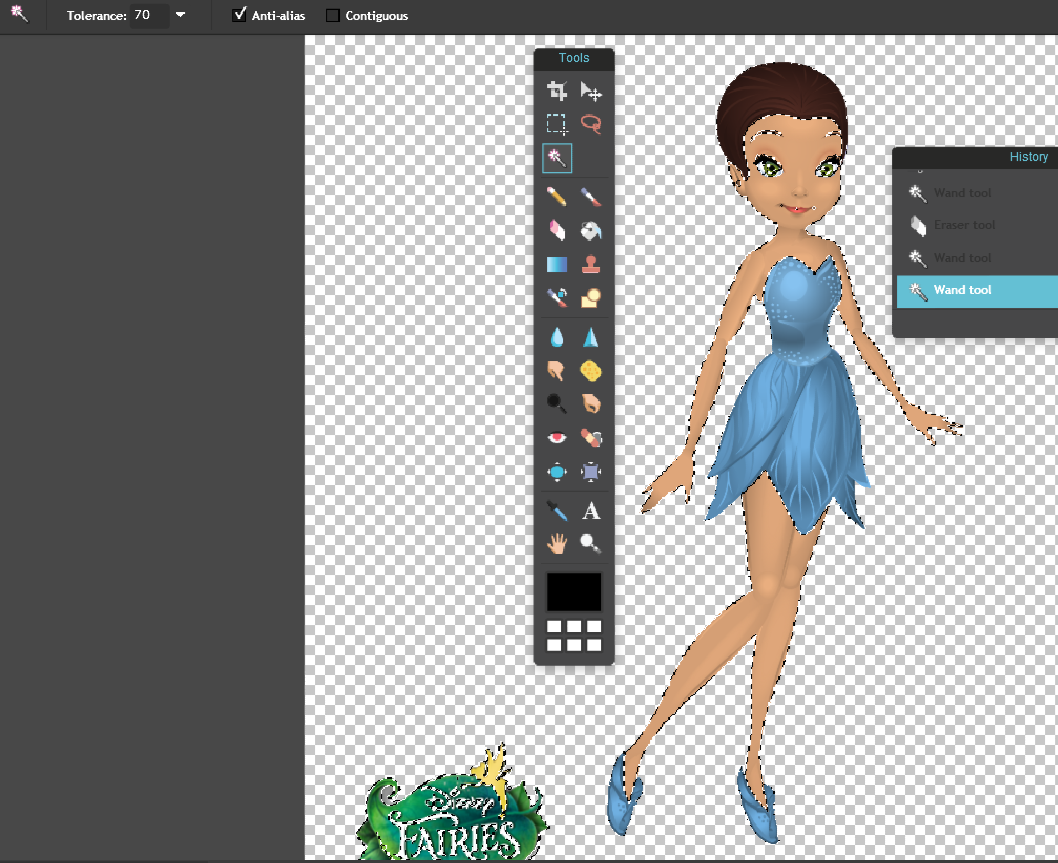
Click it and also double click the lock on layers so you see a check mark in the box. (That makes the layer transparent and moveable) Back to your friend the Magic Wand, go to the top of the screen where you will find Tolerance for the magic wand and set it so it borders the wings and body of the fairy. If you used the picture of June, set the tolerance to 50 and get rid of the wings because you will be stuck with little slivers of wings if you don’t. By doing this, the Magic Wand when you click the white area surrounding the fairy, it will outline the space plus the wings. This is a key part of you want a perfect picture without any white fuzz around the outside of the fairy. After you’ve done that, go to the eraser in the tools and go to brushes to get the solid 200 sized one to erase away! Once you are done, be sure that all white areas are gone and if there is an area that wasn’t reached with the borders created, use the wand again and click that area and erase some more. After you erase all the background, use the wand again and click outside the canvas where its gray to get rid of the borders. At the end your fairy should look like this:
Color Changing:
Now we get to the real stuff! Starting with skin and hair color. Now that you’ve mastered the usage of the magic wand and how it works, we are going to use it again. Fool around with the tolerance and also change the settings on it to an unchecked box for contagious. By doing this, any color similar to the one you click on using the wand is bordered.
There are multiple ways to change the skin color. The most effective way in my opinion is using the Brightness and Contrast option under adjustment. This way you can change the tone but not get rid of the shading or texture. As for the hair, you border it again using the magic wand and instead of going to brightness and contrast for it, go to hue and saturation and play around to your liking.
By the end the color of the hair and skin should be to what you want and the file should be transparent. This is all we are going to get to as of now and next time I’m going to show you about all the additional things that make the hair look like it truly is part of the fairy and managing the layers which will take part in making the clothing. Its a big process which builds on the basic editing skills. Never feel discouraged if things don’t work out perfect because practice makes perfect! It took me 2 years to get me to where I am now, but I wouldn’t trade my experience from those years for anything! Keep at it artists!
NEXT UP
Part Two: Layers and Layers of Hair
I had no idea tutorials where so hard, but I’m doing my best. All I can say now is practice and explore your editing systems with this foundation until I publish the next instalment.
If you have any difficulties with editing I’ll try to help you in the comments.


 Vs
Vs 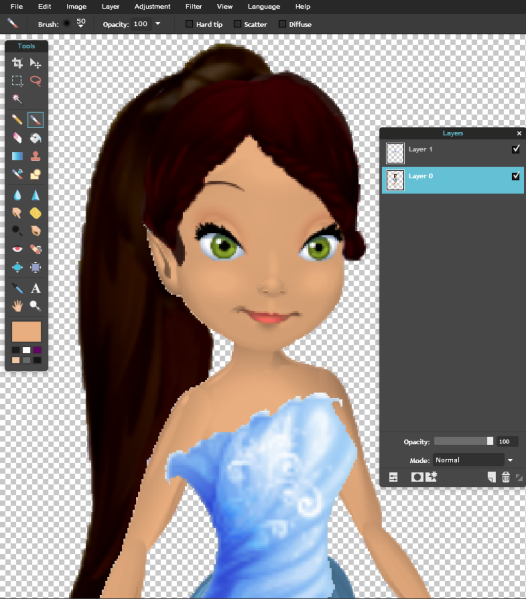
 VS
VS 
 Then given that the top of the head shoes through, go to the first layer and click it so it glows and erase the unwanted parts. If the previous hair shows through then use the tool shaped like an eye dropper but is called the color picker tool, and click the part of the skin that will match where you want to cover it up and using the soft small brushes, cover the part where the front hair didn’t cover up. In the end it should look like this:
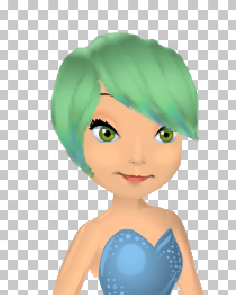 I know it looks silly but now it will look like you want. With the swept bangs in place, click the second layer with the hair front, go to Adjustments and then Hue & Saturation. Fool around with the colors until you get the desired color. Be sure to fiddle with the colorize option that makes everything the same tint and color like seen below.